File Sharing through RDP from Windows
Step 1: Launch the Remote Desktop Connection application and fill out the computer and username fields, following our guide here if you would like instructions:
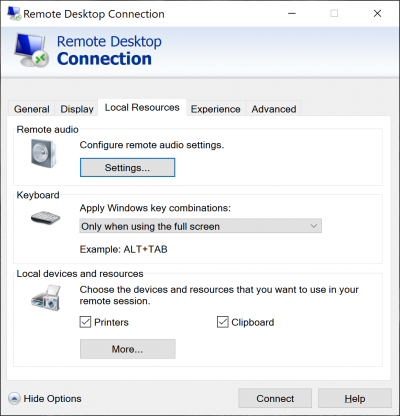
Step 2: Click on the show options arrow in the bottom right corner of the window. Then, click on the local resources tab.

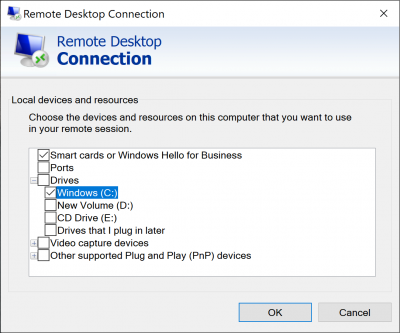
Step 3: Click on the “More…” button in the local devices and resources section. This will bring up the following window:

Step 4: Select any drives you would like to be available for file transfer from the list, and then press OK.
Step 5: Press connect to start the RDP session.
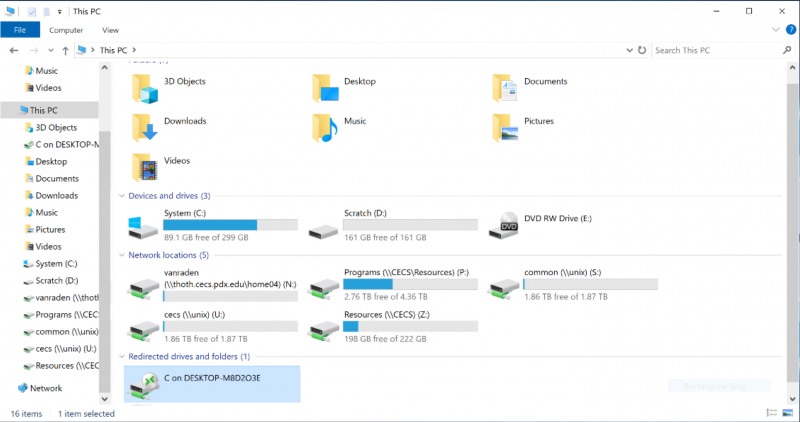
Step 6: From within the remote session, navigate to “This PC” within the File Explorer. The drives that you have selected will appear under the “Redirected drives and folders” section.

Step 7: Drag files to and from the drive like you would any other folder.
Note: If you get a message that says “Destination Folder Access Denied” when trying to transfer files, you may need to restart your RDP session and run the Remote Desktop Connection application as an administrator.
