Connecting to your Windows Home Directory
This page includes procedures for connecting to Z (department) drives, and Windows home directories from a Mac (a Tier 3 device as far as the Windows file servers are concerned). For these steps to work, you must make sure that you are successfully connected to one of our VPNs before proceeding.
Before you begin, you need to have:
- The file server name for your home directory: winhome.cecs.pdx.edu
- Your MCECS account login and password.
- The name of the shared folder you want to access. (If this is a stash, it’s the name you were given for your stash. If it is your home directory, see Step 1 below.)
Step 1 – Find the location of your Windows home directory
This is if you are trying to access home Windows home directory. Login to the MCECS Intranet through your web browser. Login using your MCECS account login and password. You will see something like this:
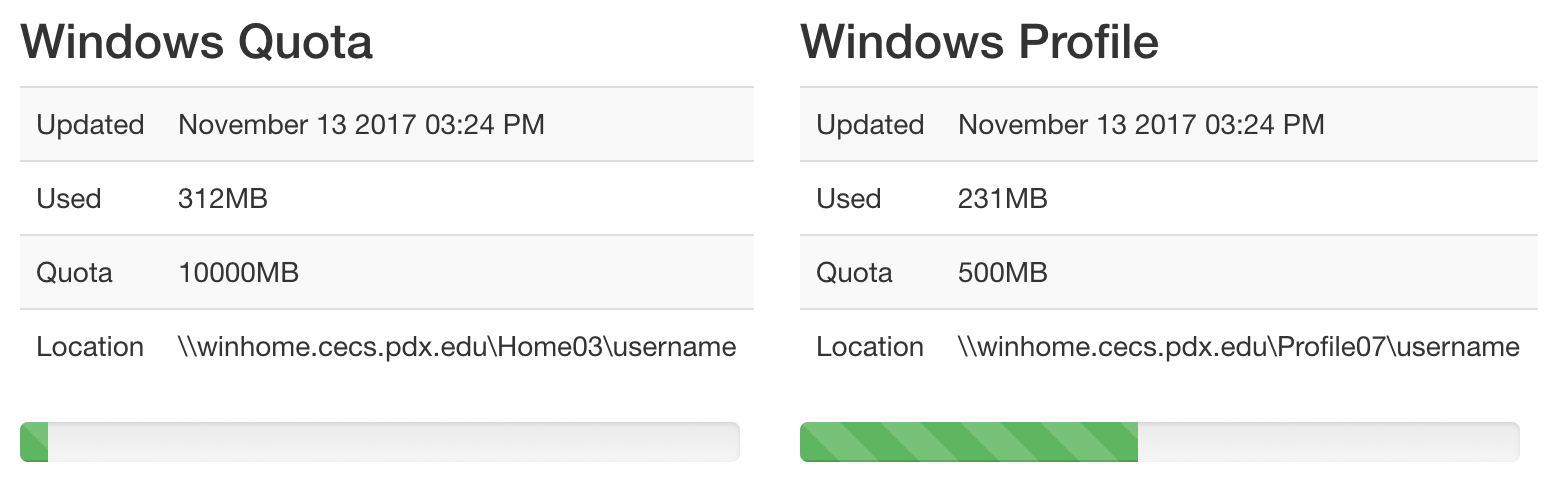
In the windows quota section, HomeXX is the folder we need for the windows home folder. Similarly, ProfileXX is is the location of your Windows User Profile.
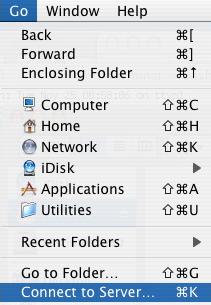
Step 2 – In Finder, choose Go -> “Connect to Server”
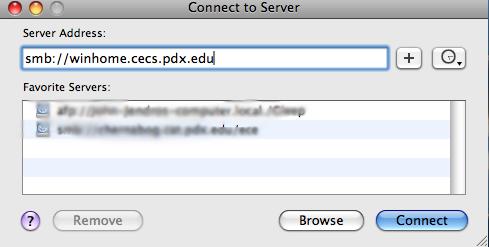
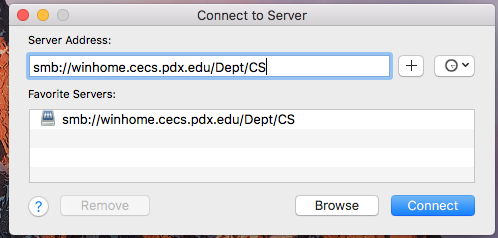
Step 3 – Enter the file server name in the Server Address box:
We use smb://winhome.cecs.pdx.edu/ for the file server address.
Step 4 – Authenticate with the file server
In the login box that appears, enter your MCECS username and password, placing CECS\ before your username.

Step 5 – Select the right top level folder and navigate to your home directory
You will see a top level folder view.
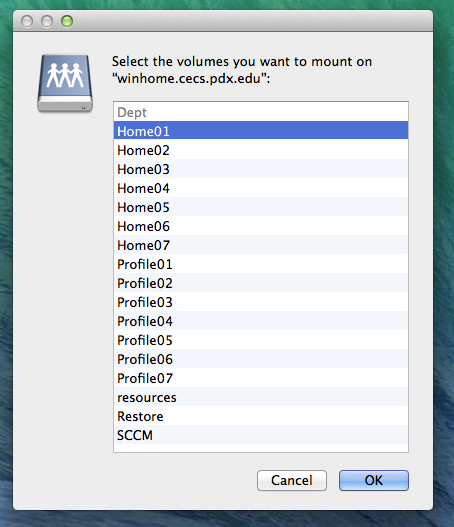
Your home directory lives in the HomeXX folder that you identified in Step 1. Navigate into that, and the find the folder within it with the same name as your username. That is your Windows home directory containing your files.
After doing this, you will usually see a reference to this connection to your home directory (called a “mount”) on the sidebar of Finder as well as a icon on your Desktop. It will last until you disconnect or log out.
Connecting to a Department Share (Z: drive)
Follow 2-4 above and use smb://winhome.cecs.pdx.edu/Dept/name_of_department as the Server Address. Replace name_of_department with the name of the appropriate share, like CS or ECE or ME.
If you do not know the name of the share, remove name_of_department from the end ( smb://winhome.cecs.pdx.edu/Dept ). When you connect, a folder will pop up containing the various department shares. Navigate to the appropriate folder.