Configuring PSU Google Mail for MCECS
Sending your MCECS email to its own folder (aka label)
You can set up your PSU Google Mail to automatically deliver your MCECS email to a separate folder or, as Google calls it, label.
Contact the OIT Help Desk if you have problem accessing your account.
Create an MCECS Label: the two options
Reuse the “mmdir” Label:
If you have migrated your MCECS email, you can use the “mmdir” folder that was created for your migrated email. You can edit the name by mousing over the “MMDIR” label until it is highlighted and a small downward facing triangle appears next to the label name. Clicking on that triangle opens a drop down menu for changing your label appearance. Choose “Edit” (third option from the bottom). This will open a pop up window where you can change the name of the folder. Rename it to something like “MCECS email.”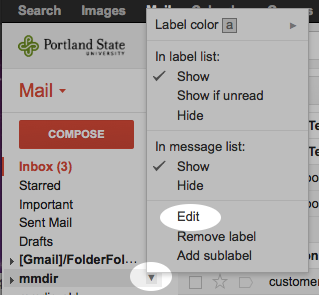
Create a New Label:
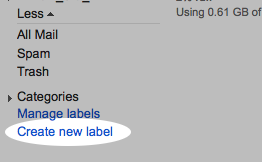
You will find the link for creating a new label on the left hand side of your PSU Google Mail webpage. Under the big red “COMPOSE” button are several labels, such as “Inbox,” “Send Mail,” “Drafts,” etc. The last one is probably “More.” Click on “More” to see more options. The very last option will be a link that reads “Create new label.” Click it to pull up a pop up window for creating a new label. Name it something like “MCECS email.”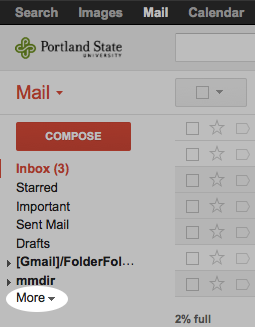
Create a filter
Step 1:
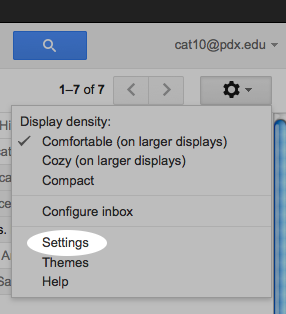
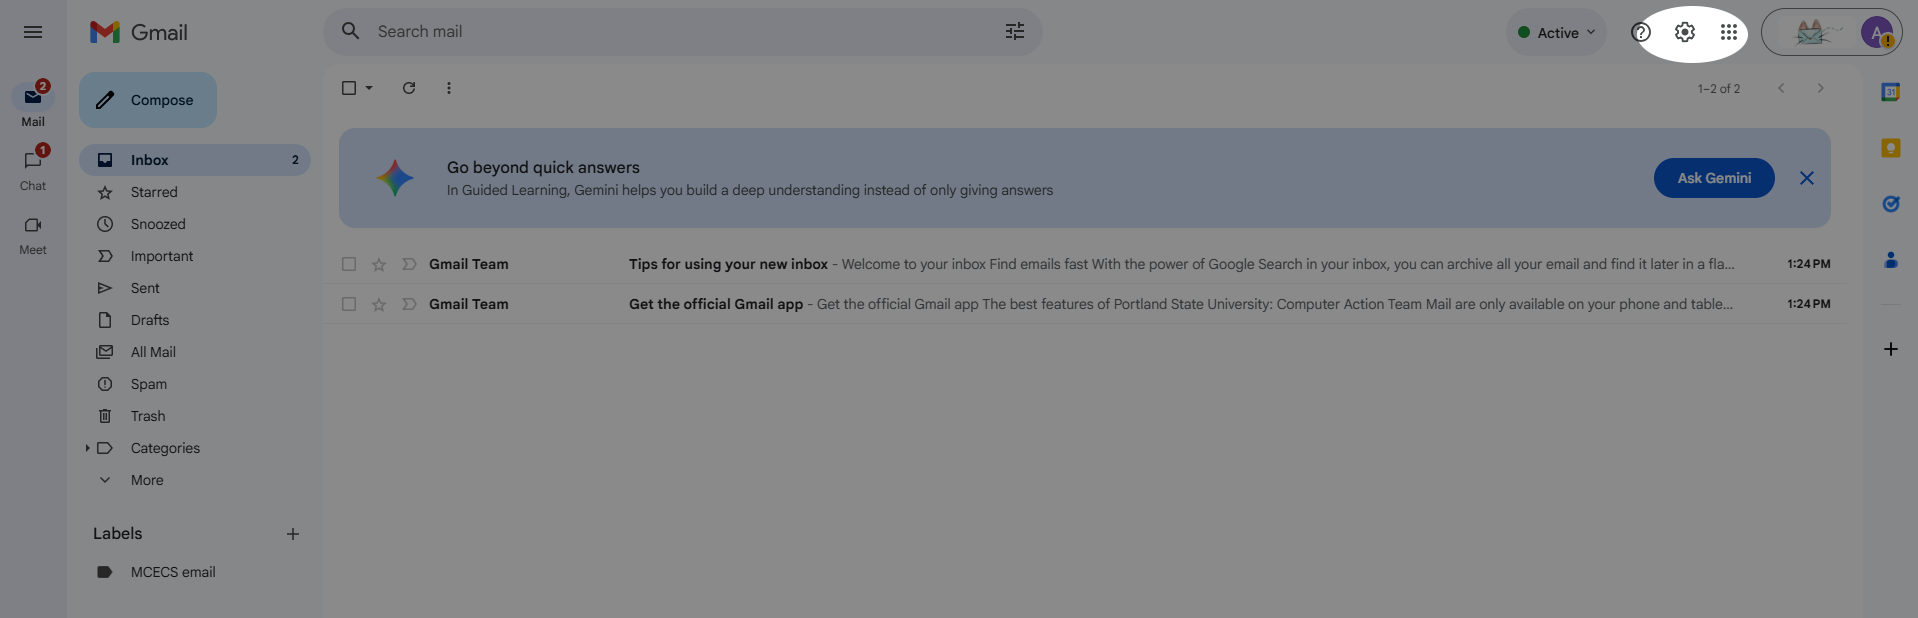
Click on the Gear icon in the upper right hand corner of your PSU Google Mail webpage.

Step 2:
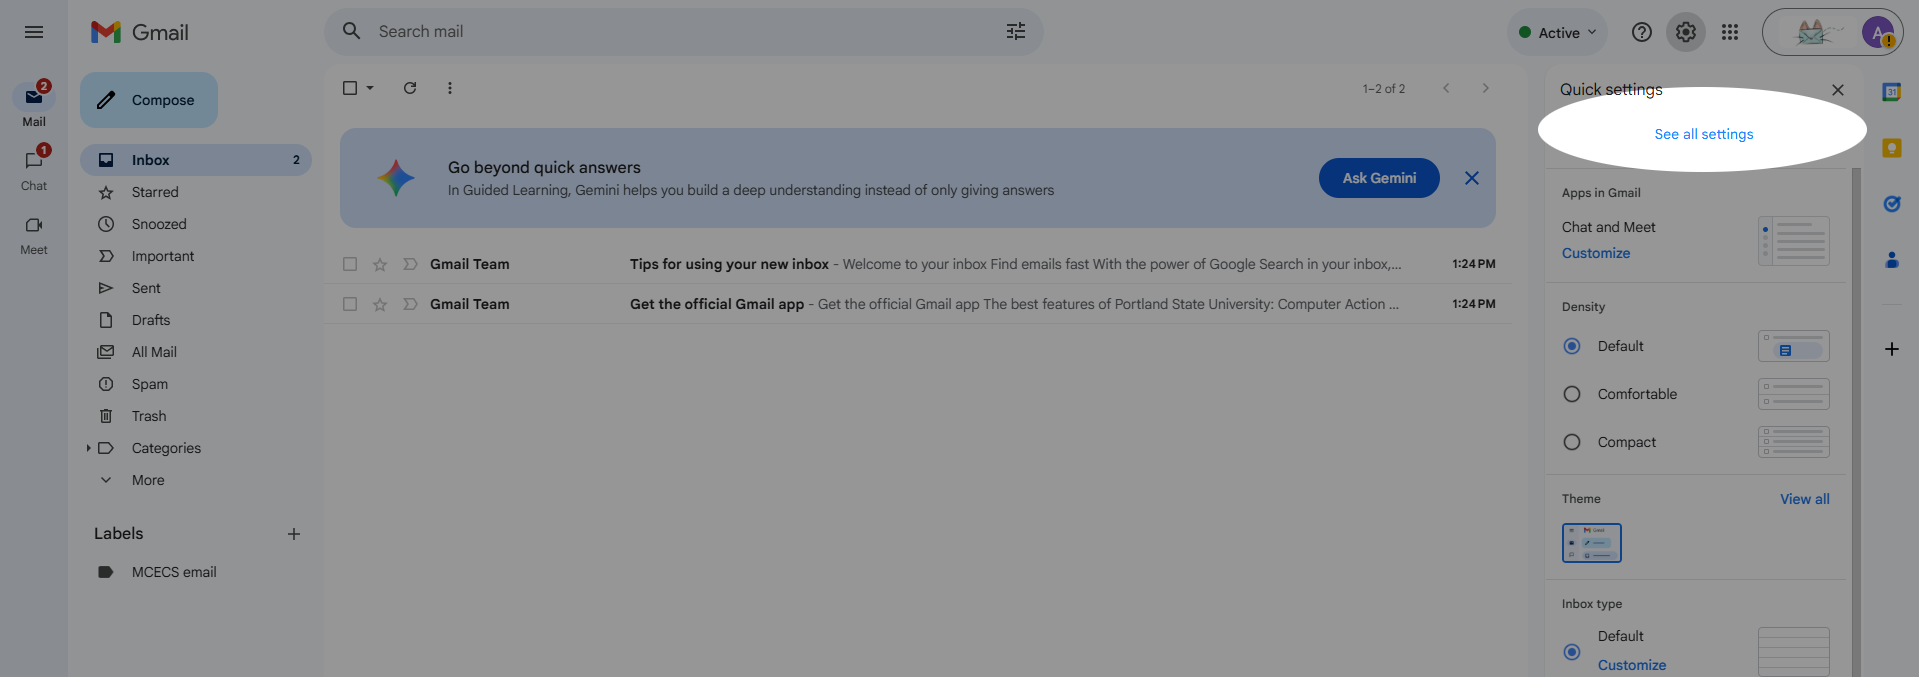
Choose “Settings” from the drop down menu
Step 3:
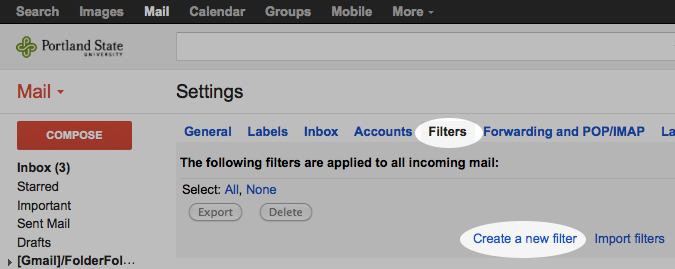
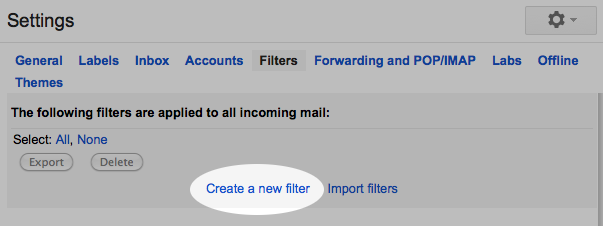
Choose the “Filters” tab (5th tab from the left).
Step 4:
Choose “Create new filter.”
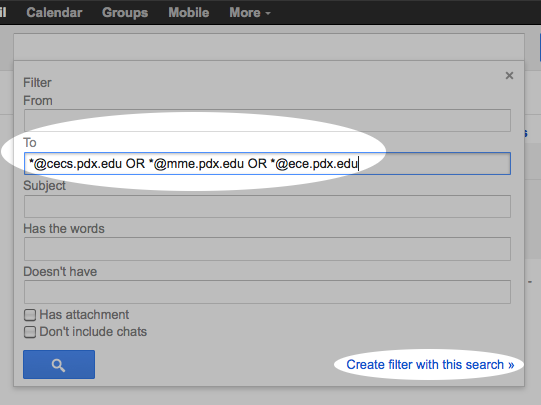
Step 5:
In the “To” field, enter the following for your @cecs address and any departmental aliases you use (such as @mme.pdx.edu or @ece.pdx.edu etc) separated by the word “OR”:
*@cecs.pdx.edu OR *@mme.pdx.edu OR *@ece.pdx.edu
Step 6:
Click “Create filter with this search >>”.
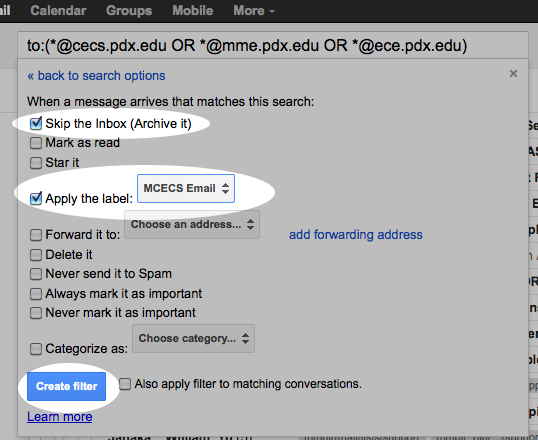
Step 7:
From the next window check the box for “Skip the Inbox (Archive it).” Check the box for “Apply the label:”” and choose the MCECS label you created from the drop down menu.
Step 8:
Click the blue “Create filter” button and you are done.
Multiple Forwarding from PSU Google Mail
These instructions will walk you through the process of forwarding your email to multiple addresses. The idea is to create a filter that, when true, forwards email to a given address. Since you want all your email to be forwarded, you need to create a filter that is always true. In this case, you will be telling Gmail that if the email is addressed to this address, forward it to the specified address.
Step 1:
Click on the Gear icon in the upper right hand corner of your PSU Google Mail webpage.

Step 2:
Choose “settings” from the drop down menu.
Step 3:
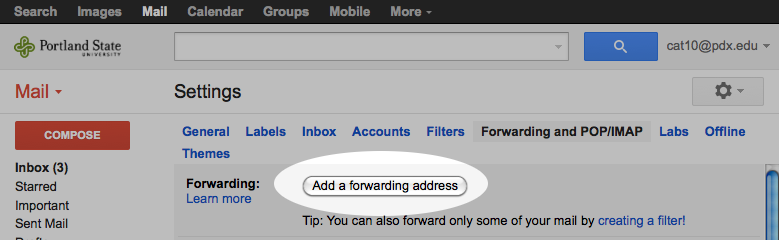
Click on “forwarding and POP/IMAP”.
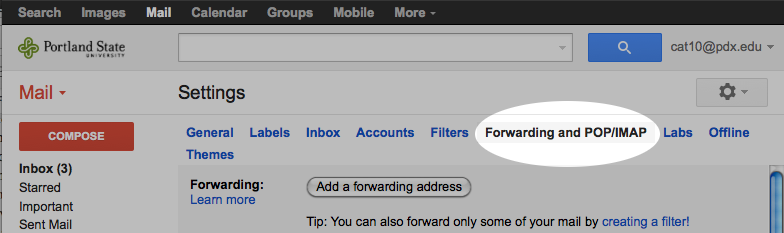
Step 4:
At the very top is “add a forwarding address”
Step 5:
From here you can add each email address that you would like to forward your email to.
Step 6:
Note that if you add an email address, gmail might send a confirmation email with a code that needs to be entered.
Step 7:
After adding email addresses, create a new filter (follow the “create a filter” directions above).
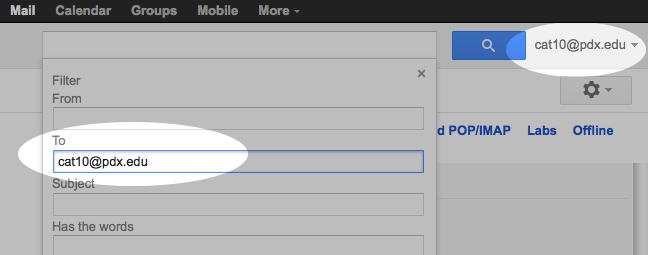
Step 8:
Enter the email address that you want to forward your email from in the “To” field. This is the email address you are currently logged into. The the “Create filter with this search >>” link at the bottom.
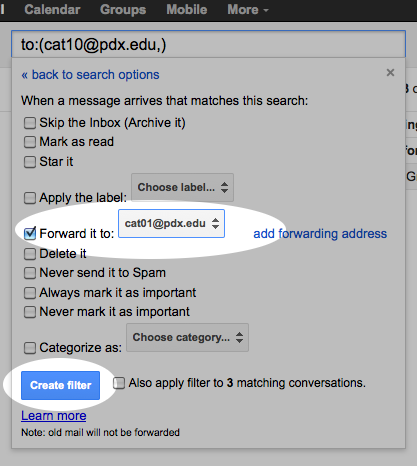
Step 9:
In the next window, click the “Forward it to” box and choose one of the email addresses that you want to forward your mail to from the drop down menu.
Step 10:
Click “Create filter”.
Step 11:
Repeat steps 7-10 for each email you set up in step 5.
Whitelisting MCECS Email
If you find that Gmail is sending MCECS email to your spam folder, you can set up a filter that makes sure that email from an MCECS address never gets flagged as spam.
Step 1:
Log into your PSU Google Mail account.
Step 2:
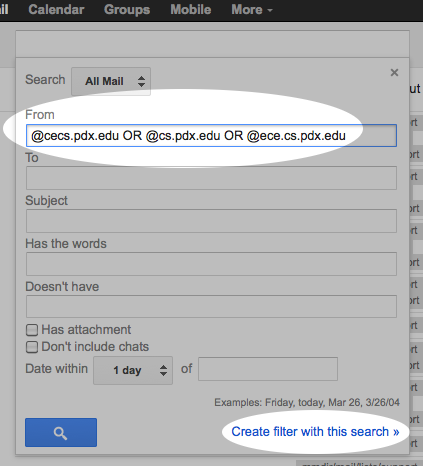
At the far right side of the search bar at the top of the page, there is a grey, downward facing arrow. Click on that to bring up the search options box.

Step 3:
From the search box in the top center of the page, enter “@cecs.pdx.edu”. You can also add departmental emails: “@cecs.pdx.edu OR @cs.pdx.edu”.
Step 4:
Click the “Create filter with this search >>” link at the bottom right corner of the box.
Step 5:
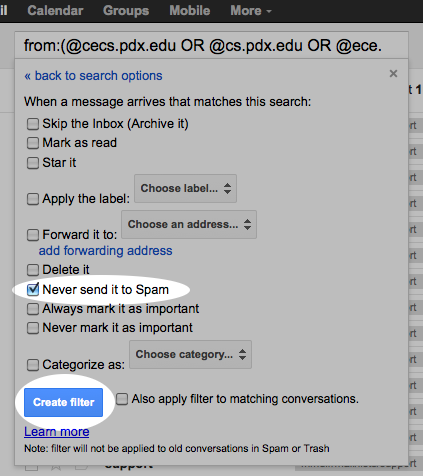
On the next window, click the “Never send it to Spam” box and click the blue “Create filter” button in the bottom left corner.
Step 6:
You can do this for any email address or domain that you want to ensure does not end up in your Spam folder.
Sending mail as your MCECS address from PSU Google Mail
Step 1:
Click on the Gear icon in the upper right hand corner of your PSU Google Mail webpage.
Step 2:
Choose “settings” from the drop down menu.
Step 3:
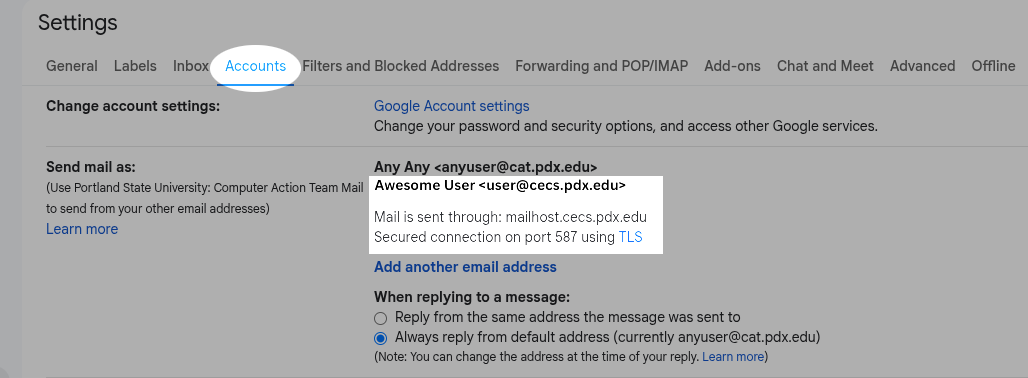
Choose the “Accounts” tab and click the “Add another email address you own” option.
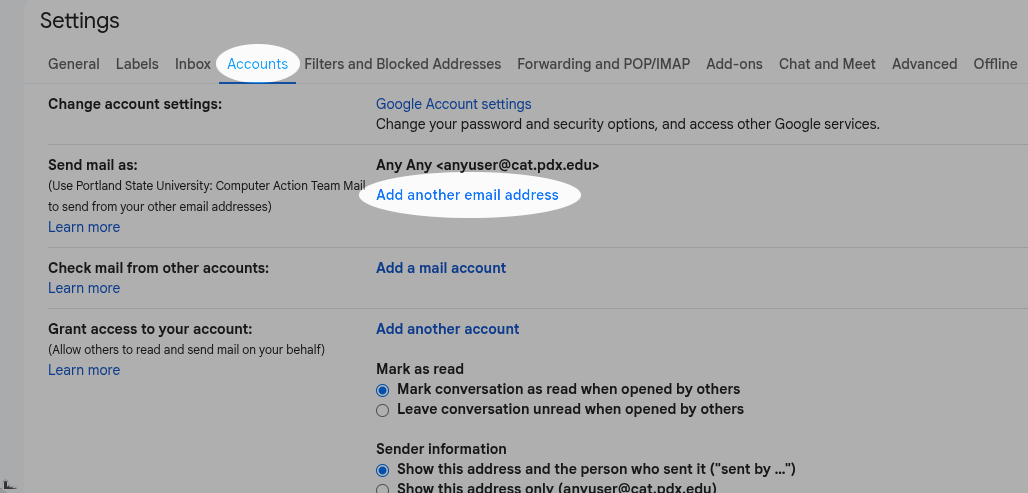
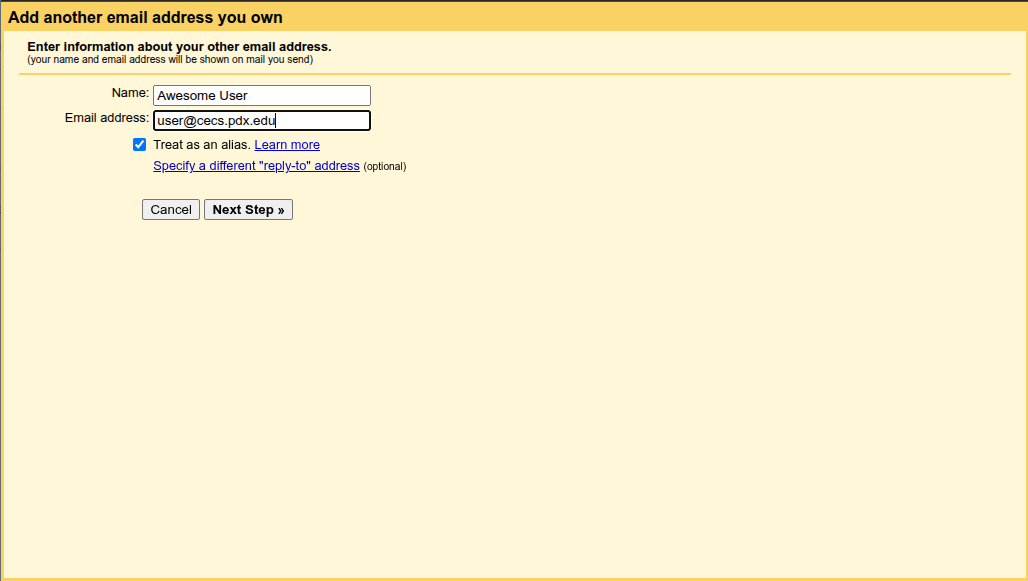
Step 4:
Enter your MCECS email address in the “E-mail address” field. You can choose to treat your MCECS address as an alias or not (click the “Learn more” link to help decide). Either option will work. Click the “Next Step >>” button to continue.
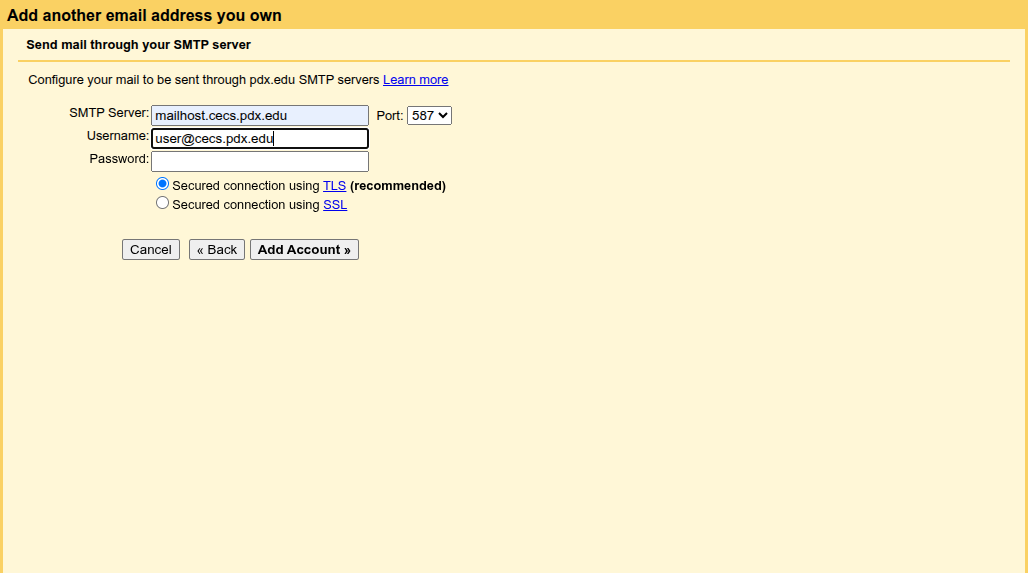
Step 5:
If “smtp.gmail.com” is the option for the SMTP Server field. Switch it to “mailhost.cecs.pdx.edu” and enter your MCECS credentials.
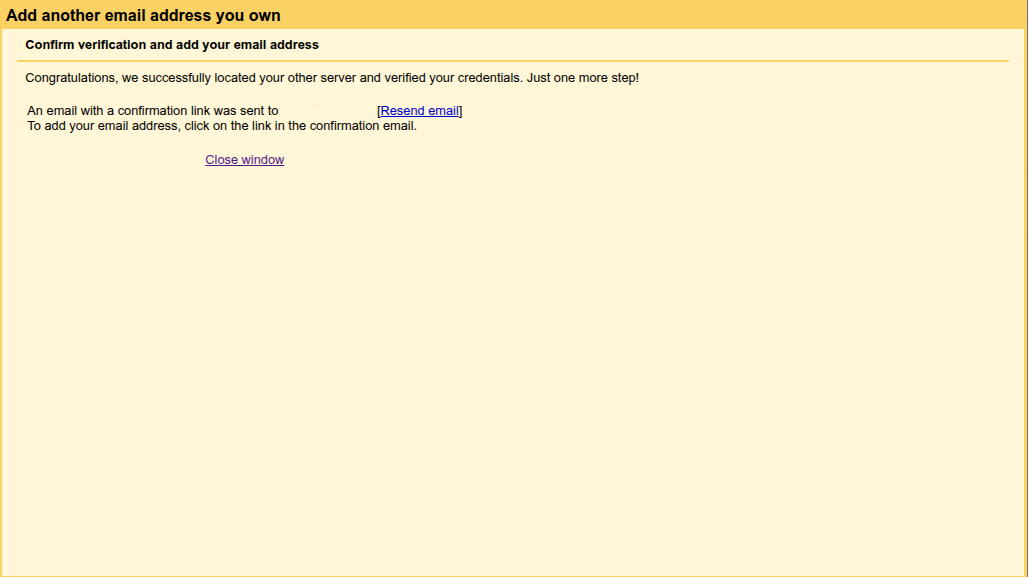
Step 6:
Once you have added the new account, a confirmation email will be sent.
Step 7:
Confirm that your new email is present
Step 8:
Now, when you reply to email sent to your MCECS address, the reply will appear as though it came from your MCECS address. When you compose a new message, you can choose the “From” address you want to send from.