How To Setup Lab Projectors
Using NVIDIA Control Panel
The purpose of this document is to show how to project the respective graphics output of each of the two EB325 PCs that are normally connected to the ceiling-mounted projectors in EB325 East and West. Also, as the primary use of these projectors is for teaching the use of CAD tools, the other operating premise of this guide is that the instructor will prefer that the monitor image is matched by the projected image.
Step-by-Step Guide
Step One
In the system tray (the icons next to the clock) select the NVIDIA Control Panel
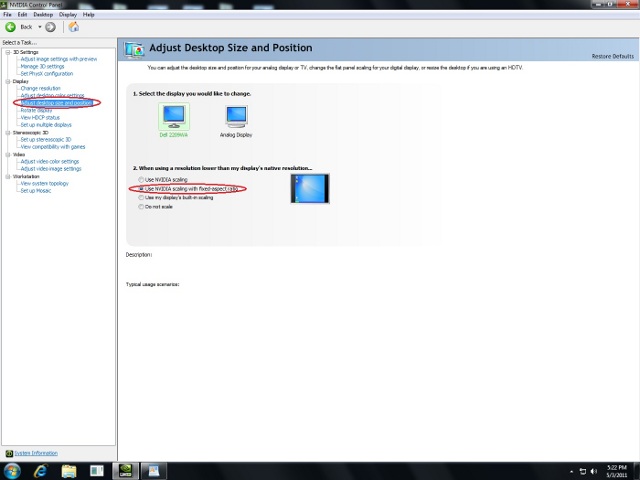
In the left side menu select “Adjust desktop size and position”
Step Two
In the middle panel select “Use NVIDIA scaling with fixed-aspect ratio”
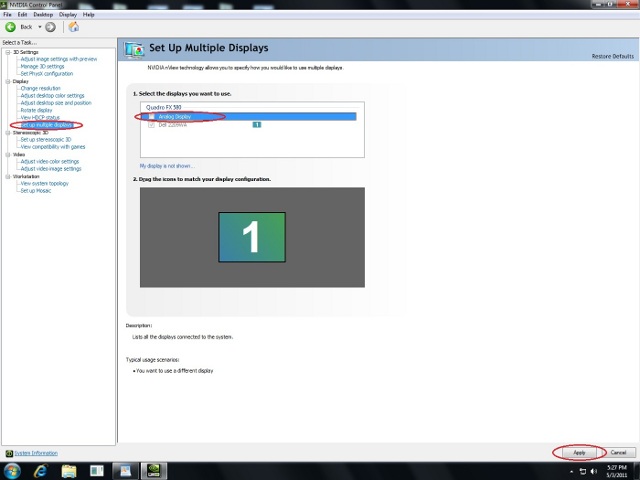
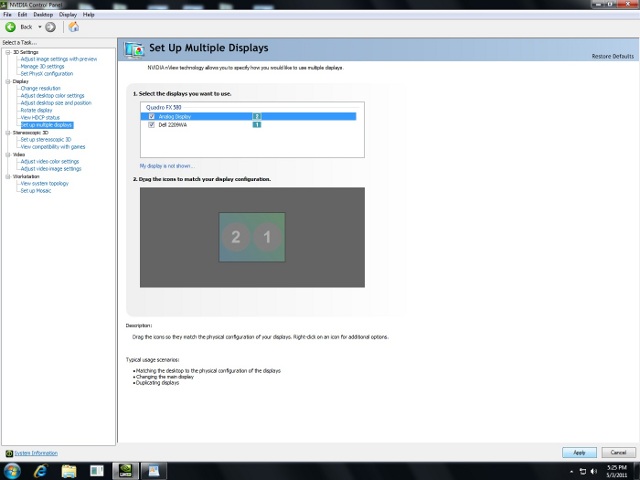
In the left side menu select “Set up multiple displays”
Step Three
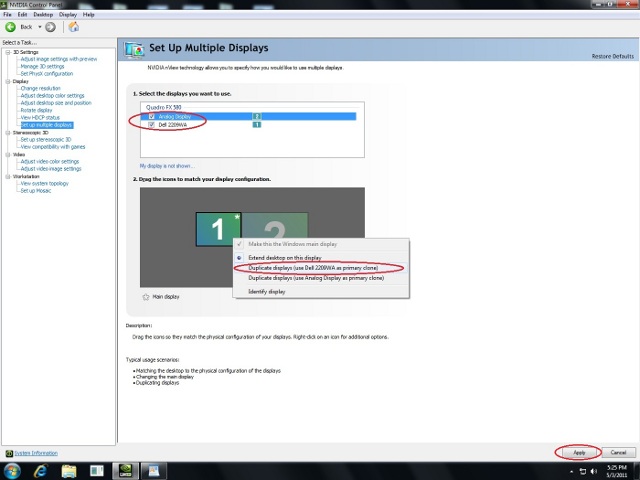
In box 1 of the center panel select both displays
In box 2 of the center panel right click and select “Duplicate displays (use Dell 2209WA as primary clone)
Step Four
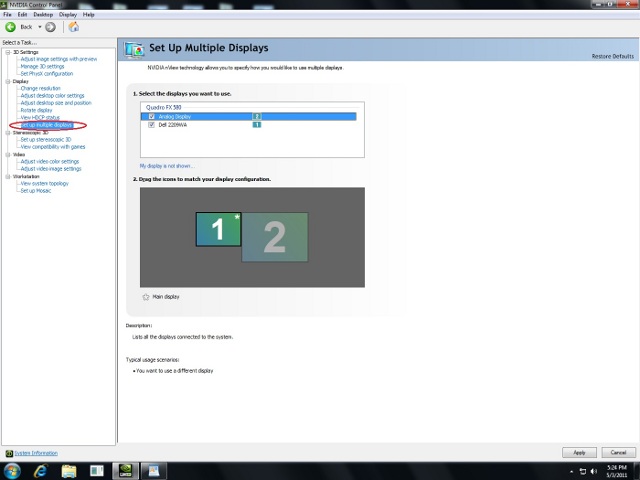
In box 2 of the center panel you should see 1 and 2 inside of a single rectangle. (as shown below)
Step Five
Click Apply in the lower right hand corner
How to Revert the Monitor to Default Settings
Step One
Deselect “Analog display” in box 1 of the center panel and click apply in the lower right hand corner.